Difference between revisions of "How to create an OpenFlyers platform?"
| Line 5: | Line 5: | ||
You just have to click on "Register". | You just have to click on "Register". | ||
| − | [[Image: | + | [[Image:welcomepage.png]] |
This is a free procedure and you can test our application as long as you want. | This is a free procedure and you can test our application as long as you want. | ||
| Line 11: | Line 11: | ||
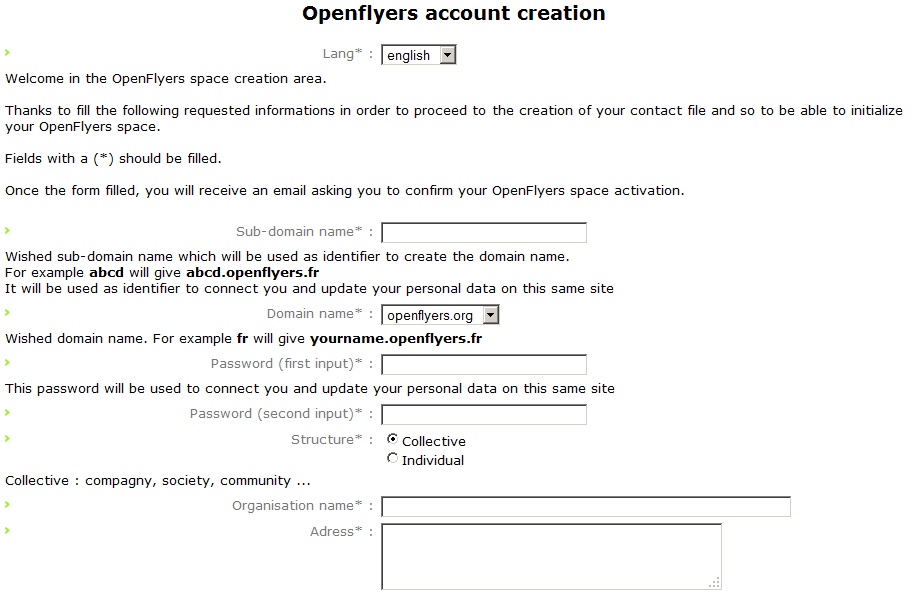
You are directed to the Openflyers account creation page. | You are directed to the Openflyers account creation page. | ||
| − | [[Image: | + | [[Image:accountcreation.png]] |
Fields with an asterisk are compulsory. Once you have completed the fields and validated your data, the following page is displayed. | Fields with an asterisk are compulsory. Once you have completed the fields and validated your data, the following page is displayed. | ||
| − | [[Image:e- | + | [[Image:e-mailconfirmation.png]] |
You are invited to go to the e-mail adress you communicated to confirm the creation of your account. | You are invited to go to the e-mail adress you communicated to confirm the creation of your account. | ||
| Line 21: | Line 21: | ||
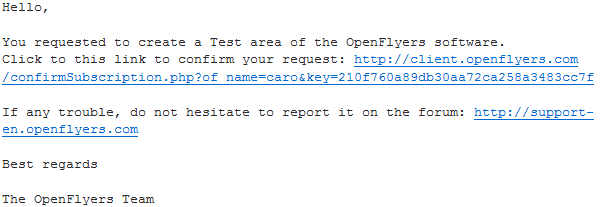
The e-mail you received is named : OpenFlyers test area, and is as followed: | The e-mail you received is named : OpenFlyers test area, and is as followed: | ||
| − | [[Image:e- | + | [[Image:e-mailsubscription.png]] |
Click on the link to activate the creation of your space. | Click on the link to activate the creation of your space. | ||
| Line 27: | Line 27: | ||
The following windows opens and confirms that the account creation is in progress. | The following windows opens and confirms that the account creation is in progress. | ||
| − | [[Image: | + | [[Image:accountcreationinprogress.png]] |
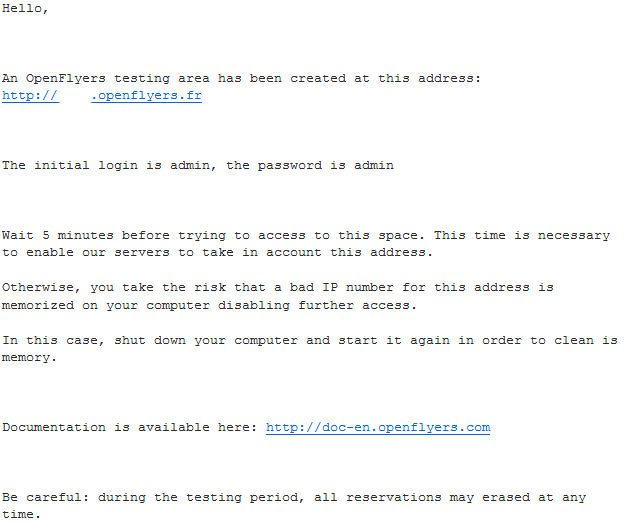
You then receive a second e-mail, named again OpenFlyers test area, which confirms the creation of your space. | You then receive a second e-mail, named again OpenFlyers test area, which confirms the creation of your space. | ||
| − | [[Image: | + | [[Image:subscriptionconfirmed.png]] |
After the creation of your customer account, a test area will be automatically created. | After the creation of your customer account, a test area will be automatically created. | ||
Revision as of 08:10, 2 September 2011
You can create a space to test our applicatio directly from our public website:
http://www.openflyers.com/index.php/english
You just have to click on "Register".
This is a free procedure and you can test our application as long as you want.
You are directed to the Openflyers account creation page.
Fields with an asterisk are compulsory. Once you have completed the fields and validated your data, the following page is displayed.
You are invited to go to the e-mail adress you communicated to confirm the creation of your account.
The e-mail you received is named : OpenFlyers test area, and is as followed:
Click on the link to activate the creation of your space.
The following windows opens and confirms that the account creation is in progress.
You then receive a second e-mail, named again OpenFlyers test area, which confirms the creation of your space.
After the creation of your customer account, a test area will be automatically created.
You can test our application as long as you want.
Welcome to OpenFlyers!
After that, to lauch the production, and get the opportunity to have the setting package, please consult the following indications:


